
Do you have customers that would like to purchase their current rental item? Follow along with the steps to properly check in the rental item and sell the item out of standard inventory.
Overview
- Step 1: Check Back In Rental Item
- Step 2: Take out of Rental Inventory
- Step 3: Add to Standard Inventory
- Step 4: Sell Item
Step 1: Check Back In Rental Item
A list of all your rentals will appear. Use the search bar to search for rental you want to view or check-in.

Click on the menu next to the rental. In the drop-down menu, click on Check In Items.

A new rental window will appear with the rental items currently checked out. To check in rental items, choose to Check In Items button beside the rental item.

A new window will appear with the listed rental. Inspect the rental item and add any damaged or destroyed/missing rental values to the rental. Once finished, click on the [Confirm Checkin] button.

The rental item will now appear as Checked In and will be visible as On Hand when searching through rental products with serial numbers.

Finish the rental by checking in any additional items. When all items are checked in the rental will no longer appear on the rental list screen.
To learn more about checking in a rental item, click here.
Step 2: Take out of Rental Inventory
- Open a rental items product profile, then click on the rental tab.
- At the bottom of the page, you will see a 'serial #' section with all entered serial #'s of the product.
- Click on the 'edit serials' button, a new window will appear.
- Click on the drop-down list beside the product and adjust the status to 'sold'
Step 3: Add to Standard Inventory
+ If the product has not been created as a standard product, you must create in inventory
+ If you are selling a serialized product, remember to turn on the 'Serial #'s' inside of a
Select the product in 'Standard Inventory' to open it's profile, and click on 'serials' tab.
Then at the bottom of the page, enter the serial # of the product
Step 4: Sell Item - Create Invoice
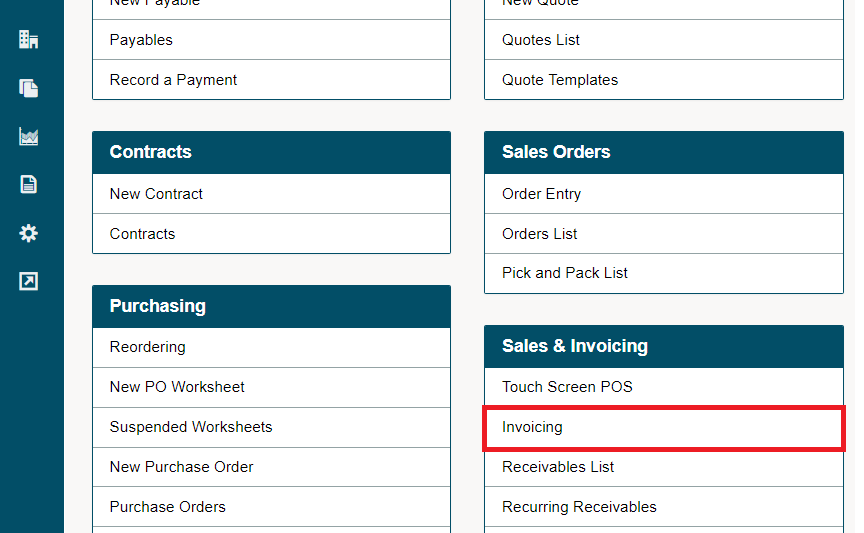
Go to Accounting.
Under the Sales & Invoicing Heading, Choose Invoicing.
If prompted, choose the Location and Till.
Type in a customer and at least one item.
Choose complete transaction.

Be sure to select the serial # of the product if it will be needed for tracking purposes in the future.
For more information on how to create an invoice, click here.
Comments
0 comments
Please sign in to leave a comment.